Decorate Your Omaha Home on a Budget
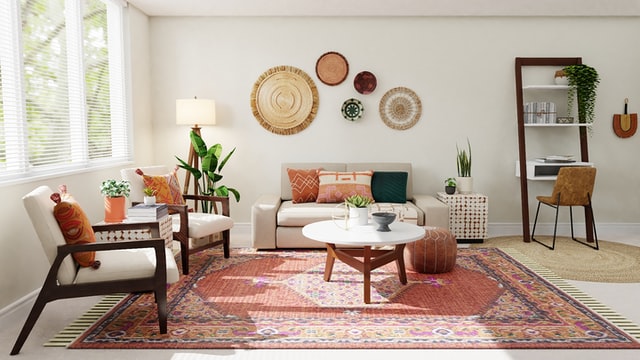
Many Omaha homeowners are interested in decorating according to their individual tastes while coming up with a visually appealing look. Those magazines make it seem so simple, but it can also be quite expensive. Even if your budget is limited, you can still get the look you want. You can save money by redecorating your home with these ideas.
Reuse
Before buying new furniture, bedding, and fixtures that will quickly consume your budget, take stock of what you already own. Try to repurpose items. A simple piece of furniture can be transformed with new hardware or a fresh coat of paint.
It is possible to use different types of furniture for different purposes. An unused dining table can be turned into a desk. An old sofa table can be transformed into a mobile bar by adding wheels. Or, you can recycle and revamp an old dresser.
Simple Appearances
Bigger isn't necessarily better. Without spending a lot of money, a few simple changes can have a considerable impact. One way to achieve this is to paint a feature wall or change the color scheme. The throw rugs and light fixtures can also be changed. Even the simplest of changes, like changing the lamp shade, can have a significant impact.
Pillow covers and duvets can be added to bedspreads. But what is a duvet? A duvet is similar to a pillow case for a bedspread. You can pair duvets with existing bedspreads for a unique look. You could also make your own cover if you are looking for something more customized.
Shopping on a budget
If you want to purchase some items, consider purchasing used items. You can find inexpensive décor items in thrift stores and second-hand stores. In addition to wholesalers and liquidation merchants, salvage yards can save some money. It is also important to consider other uses for items.
Be on the lookout for items that people are trying to sell. Visit flea markets and yard sales in the Omaha area, especially now that Spring is here. There are many items available for cheap on eBay. Swap meets can also provide you with what you need, while also letting you get rid of items that no longer fit your needs.
Artwork
Rather than buying expensive reprints or originals, create your own. Use your decoupage or painting skills. Display your child's artwork. You can download free artwork to print at home. Repurpose some old wooden frames. Sponging and foiling can be used to create decorative displays.
One at a Time
It's important to take things one step at a time. Don't redecorate every room at once. Consider dividing your budget into chunks for each room that you would like to redecorate. If you look at each room individually, you may find that there is some money left over for other rooms. By taking on one room at a time, you can avoid becoming overwhelmed by taking on too much all at once.
No matter how small your budget is, there are numerous options for redecorating on a budget. With redecorating, you can make huge or small changes, both of which impact the end result. It's up to you to choose an environment that best represents your tastes in your Omaha home.
Have your home needs changed in the past year? Perhaps you’ve outgrown your present home, or need to downsize to a more suitable home. If you’re ready to make a move, let’s connect and talk about all the amazing opportunities that are available to you!
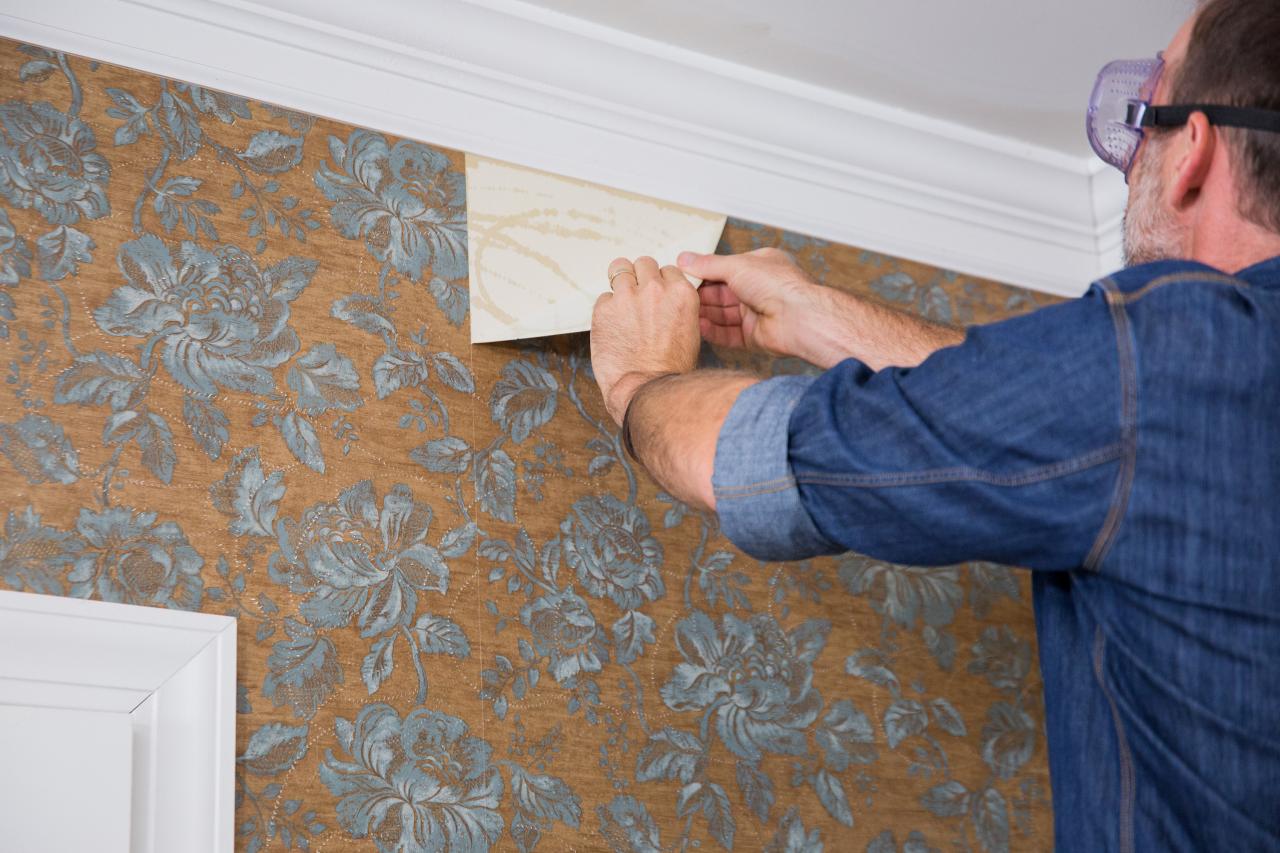 "I love removing old wallpaper!" said no-one ever. When it comes to removing old wallpaper, most people would put it up there on the "not fun" list with getting teeth pulled.